Today's project is a tooth holder I concocted from a baking soda tin. Gotta keep those pearly whites looking fabulous for when the tooth fairy arrives!!!
~ Tooth-In-Waiting ~
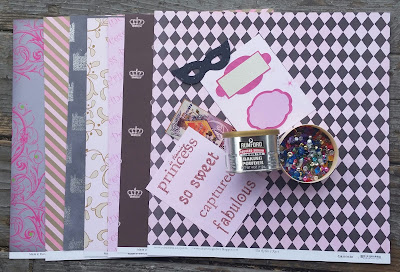
To begin I selected a variety of girly papers and necessities from my Robin's Nest stash of products.
Step 1: Remove and discard the lid and label from a 4oz Baking Soda container.
Step 2: Spread adhesive around the can opening, dust with glitter. Before it dries add large dots of glue on top of the glitter and place Metallic Pink Dew Drops.
Step 3:Cut Girl Swirl Glittered Cardstock to size and adhere to can. *Wrap twine around the paper while the glue is setting to get a firm bond.
Step 4: Cut label from Princess Cardstock, ink the edges and adhere to can. Cut crown from Girl Crown Glittered Cardstock and adhere to label. Add lavender Precious Girl Diamond Dew Drop and pink Daughter Mini Dew Drops to label. Add trim around base of label.
Step 5: Cut a strip of paper 1.5 by 6" from Rosy Chevron Cardstock. Cut a 1.25 by 5" and a 1.25 by 7" strip of paper from Rosy Diamond Carstock. Roll strips of paper around a chopstick for shape. Adhere with a 1/4 inch overlap.
Step 6:Cut words from Girl Word Titles and adhere to paper straws.
Cut castle from Silver Castles Glitter Cardstock and adhere to trimmed Baby Girl Tag.
Add Mettalic Silver Dew Drops. Adhere to paper straw.
Add Mettalic Silver Dew Drops. Adhere to paper straw.
Decorate Black Mask Die-cut with glitter glue.
Adhere to paper straw, add flower and glitter floss.
Cut flourish from Pink Swirl with Green Cardstock.
Apply letters. Adhere to paper straw.
Adhere to paper straw, add flower and glitter floss.
Cut flourish from Pink Swirl with Green Cardstock.
Apply letters. Adhere to paper straw.


No comments:
Post a Comment