Fall in my area starts with the return of rain and the greening up of the grass and bushes as things recover from fire season. The nights become colder and the leaves begin to change;
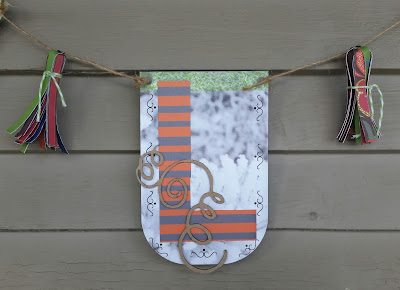
Fall puts on a color show! Today I have a banner to celebrate this season.
For a little extra fun I made paper tassels with the scraps.
I cut the letters from Leaf Glitter Cardstock and Orange Bones Cardstock with the WeRMrk Alphabet Punch Board.
The base of the banner is 4x6 pieces of Black and White Pine Tree Cardstock with the lower corners rounded.
The top of each banner piece is reinforced with washi tape. Before attaching the letter I punched all around the banner's edge. I added laser cut Chipboard Leaves and Flourishes by Gina's Designs to each banner piece.
The banner pieces are strung on Natural Twine with a few added paper tassels.
Paper Tassels
Tassels are all the rage and with a few snips and a brad or two you can have an assortment to decorate your latest project in corresponding colors and papers.
Tassels are all the rage and with a few snips and a brad or two you can have an assortment to decorate your latest project in corresponding colors and papers.
For each tassel I used 10 strips of paper, cut to 6x.25 inches; a small brad; and 10 inches of twine. Two are from the Green Elephant Glitter Cardstock and the others are cut from the Leaf Glitter Cardstock.
I assembled the colors into two starbursts, pierced them at the center, and used a glue stick for adhesive.
When the paper strips were dry I stacked them and added a brad through the center.
I curved the strips down from the center brad and tied the twine around the upper portion. I trimmed the loose edges of the twine and curled the tassel strips up-ward. I threaded twine through the top strip of paper for hanging.
Supplies:
Paper, Natural Twine:The Robin's Nest
Chipboard:Gina's Designs
Washi Tape:Love My Tapes
Punch #916:Kreaxions
Brad:Spare Parts
Alphabet Punch Board:We R Memory Keepers
Scrap On!
~charity~


No comments:
Post a Comment