Showing posts with label chipboard. Show all posts

Wednesday, April 25, 2018

Handmade Flowers and Foiled Paper Diecuts

I spent the weekend playing with Fairie Dust, handmade flowers, and foiled paper diecuts! I love this Graphic 45 paper pack so much I don't want to waste a even a SCRAP! I made the layout below with less than two sheets of patterned paper, one and a half sheets of cardstock, and assorted foiled paper scraps.
~ Believe ~
The first trick is to use front and back of the same patterned sheet. That plaid is the reverse of the sweet pea and violet paper. The second trick is to cut the chosen patterned paper into 3 strips of verying width and cut about an inch off the top of two of those strips.
Mount the shorter strips on either edge of a cardstock sheet, about 1/2 inch in from the edge.
The longer strip should be turned over and mounted over the gap on the cardstock. The longer strip will overlap each side by half an inch. I also added a 1" strip of patterned paper down the length of the longer strip for contrast and layers. You can see the thin strip of blue peeking out, below.
I used chipboard and wood shapes as well as an assortment of die cuts for clusters between the layers. Rinea's Marigold, Violet, and Lavender foiled papers are the exact hues to compliment the Fairie Dust collection.
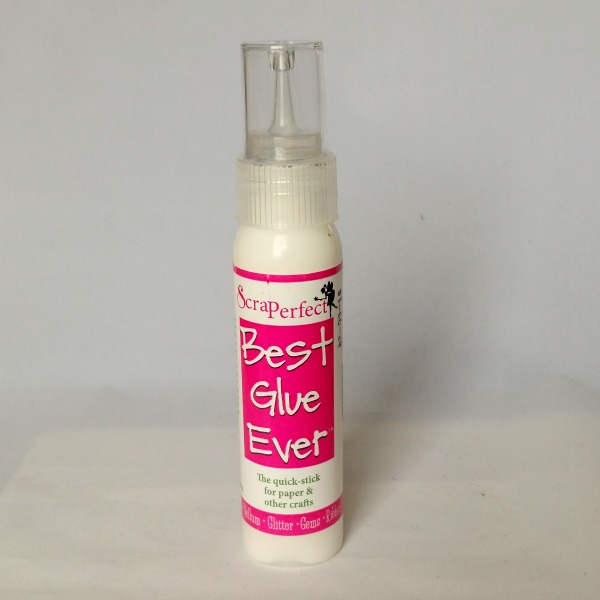
The multi-layered flowers are cut from 2x12" strips of patterned paper from the Fairie Dust collection. After die-cutting the flowers I inked the edges, rolled the petals, stacked them with Best Glue Ever and added a gem for the center.
The plaid paper was a little too busy so I added white doilies for a bit of definition. Scattered chipboard words and a title made from one of the stickers finished off this layout. I love that the orange stuffie in the photo is the exact shade of the Marigold Foiled Paper and the Sweet Peas.
I loosely followed the sketch below by Laura Whitaker.

Supplies:

Cardstock:Crafter'sWarehouse
Patterned Paper, Stickers:Graphic 45
Foiled Paper:Rinea
Dies:Tim Holtz, Crafter's Companion, Spellbinders, Amazon
Ink:Close To My Heart
Wood Shapes:Peachy Cheap
Gems:Michaels
Glitter Glue:Ranger

Scrap On!

~Charity Hotrum~

Wednesday, June 14, 2017

How To Make Flowers for A Spectacular Sunshine Layout

Here is an easy tutorial if you need to know how to make flowers for a spectacular sunshine layout. I like to give my projects the personal touch of matching embellishments. For this one pager I was able to coordinate my flowers with my title as well as my background cardstock, all from The Robin's Nest.
~ Hello Sunshine ~
To begin this layout I chose the Moss Green Glitter cardstock and sewed a strip of the Snow Covered Trees cardstock along the side.

My photo mat started with several strips of washi tape. I topped this with layers of Wedding Cutouts cardstock and Smoky Chevron cardstock.
 I stitched these layers down then added two ephemera cards from the Saffron Cards collection. The card tucked under the photo I cut in half to offer multiple focal points.
 Now that my basic layout was ready I made the flowers. The Wedding Sticker sheet was just the right colors for my theme. I punched two sets of the same flower in a similar print and one set of smaller flower in a contrasting color. I stacked the larger flowers with the petals opposite of each other. The small flower went on top with a Blue or Yellow Dew Drop for the center.

    To hold these layers of flowers together I used the Best Glue Ever. This super strong yet fantastically flexible glue from ScraPerfect is wonderful for hand made flowers.
I punched flowers from Bunny cardstock to coordinate with the Saffron Cards. The smaller flowers are from the Daisy Stripe Teal cardstock. I used Blue Dew Drops for the centers of the yellow flowers also. 
 Embellie Gellie made it super easy to place dew drops at the flower centers and with the cork chevrons.

For a little variety I added a pre-made flower as the center of each flower cluster. The final touches of wood leaves and chipboard vines are held of with just a drop or two of BGE.
The Saffron Ephemera Cards were perfect for accents as well as a title. They had just the right hues and delicately flourished letters.
The blues and yellows of the flowers add to the elegant look of this one page layout. Their mild tones create the perfect foil for this poignant black and white photo.
 
Supplies:
Paper, Dew Drops, Ephemera Cards:The Robin's Nest
Pre-made Flowers:Prima
Cork:American Crafts
Vines:Gina's Designs
Wood Leaves:Peachy Cheap
Washi Tape:Love My Tapes, MME,
Glue, Embellie Gellie:ScraPerfect

Scrap On!

~charity~

Tuesday, June 6, 2017

How To Make a Statement With Beautiful Metallic Frames

Today I am sharing this one page layout that makes a statement with beautiful metallic frames. Last summer I spent a few days in Tacoma with a dear friend. We enjoyed an idyllic morning at Point Defiance Park. These photos are from the Japanese Garden.
~ Point Defiance Park ~
The frames are made from Rinea Foiled Paper in Copper Glossy. I used the Metallics Variety Pack but it also comes on a roll.
For the detailed points I used a fancy frame die and cut the corners off at a diagonal. The foiled paper takes the dry embossing in such exquisite detail.
 For the third photo I used a thinner frame from the same die set.
 The sketch I used had lovely groupings at the corners. I choose wood veneer leaves and chipboard cameras for my layers. ScraPerfect glue is the ideal answer for attaching wood veneer. It only takes a drop or two of the Best Glue Ever and holds securely. The No-Clog Writing Cap makes the drops super easy to place.
This 3-photo layout is my entry for Stuck Sketches June 1st Challenge. Here is the sketch by Laura Whitaker:
Supplies:
Paper:BoBunny
Foiled Paper:Rinea
Chipboard:Studio Calico
Cork:Denise Parcells Design
Acetate Circle:Glitz Design
Washi Tape:Love My Tapes
Cardstock:Warehouse Paper Co.
Embossing Powder:Wow Embossing
Die Cut Labels:Elle's Studio
Wood Veneer:Peachy Cheap
Nesting Dies:Spellbinders
Ink:Color Box
Stencil:Kite

Scrap On!

~charity~

Thursday, September 15, 2016

Fall Banner

 Fall in my area starts with the return of rain and the greening up of the grass and bushes as things recover from fire season. The nights become colder and the leaves begin to change;
 Fall puts on a color show! Today I have a banner to celebrate this season.
For this banner I used a mix of the Robin's Nest fall and winter papers.
For a little extra fun I made paper tassels with the scraps.
I cut the letters from Leaf Glitter Cardstock and Orange Bones Cardstock with the WeRMrk Alphabet Punch Board.
The base of the banner is 4x6 pieces of  Black and White Pine Tree Cardstock with the lower corners rounded.
The top of each banner piece is reinforced with washi tape. Before attaching the letter I punched all around the banner's edge. I added laser cut Chipboard Leaves and Flourishes by Gina's Designs to each banner piece.
The banner pieces are strung on Natural Twine with a few added paper tassels.
Paper Tassels
Tassels are all the rage and with a few snips and a brad or two you can have an assortment to decorate your latest project in corresponding colors and papers.
For each tassel I used 10 strips of paper, cut to 6x.25 inches; a small brad; and 10 inches of twine. Two are from the Green Elephant Glitter Cardstock and the others are cut from the Leaf Glitter Cardstock.
I assembled the colors into two starbursts, pierced them at the center, and used a glue stick for adhesive.
When the paper strips were dry I stacked them and added a brad through the center.
I curved the strips down from the center brad and tied the twine around the upper portion. I trimmed the loose edges of the twine and curled the tassel strips up-ward. I threaded twine through the top strip of paper for hanging.

Supplies:

Paper,  Natural Twine:The Robin's Nest
Chipboard:Gina's Designs
Washi Tape:Love My Tapes
Punch #916:Kreaxions
Brad:Spare Parts
Alphabet Punch Board:We R Memory Keepers

Scrap On!

~charity~