Showing posts with label Calambour. Show all posts

Monday, February 11, 2019

Decoupage and Stencils Decorate a Dress Form

The perfect canvas for decoupage, stencils, paste, and metallic paint is a dress form. This beauty is 14" tall with a 5" vintage spool as a stand. My recent delivery of Calambour products give her an air of sophistication and charm.
My first step was to paint the form with Calambour decoupage glue. I ripped the rice paper into large strips and placed them on the wet glue. I applied another layer of glue over the paper. I only had one piece of the Victorian Cherub rice paper so I used Calambour Metallic Chocolate paint to patch over the uncovered areas.
 A strip of the Metallic Chocolate shows across the back as well as on the neck and shoulders. I was able to apply the paper to the front of the form evenly and fairly straight. The sections on the back didn't go on as well, but they give her a sashay so that's alright!
 Calambour 3D Glossy Gel in Ducat Gold is layered through stencils to create the fleur de lis on the dress forms left side and the paisleys on the right. Calambour Plaster Effect Mortar (paste) adds a series of leaves, dots, flourishes, flowers, and butterflies with the help of even more stencils.
 In place of a heart I have given this lady a blue butterfly. I stenciled on a butterfly with Plaster Effect Mortar then painted it with Calambour Metallic Tiffany paint. Given the curve, the placement of the butterfly took me a few tries. The resulting flutter of Tiffany Blue makes it all worth while!
My first dress form had a number of lessons for me. Some of those were about curves and letting go of perfection. The majority though, were about the fun of experimenting, taking chances, and creating for the fun of it!

Craft On!

~charity hotrum~

Thursday, January 24, 2019

Florals and Feathers Wedding Layout

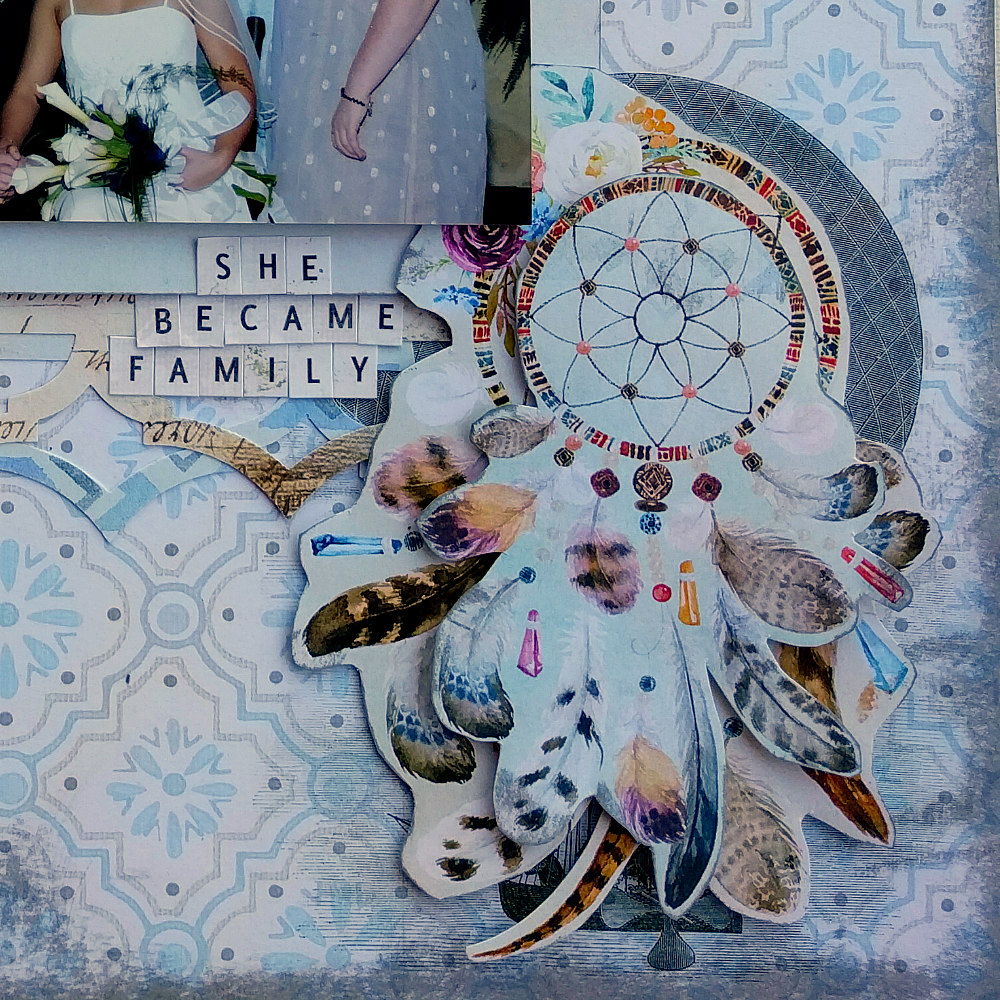
Nothing says wedding and new beginnings quite like florals and feathers. I have a wonderful new batch of papers from Calambour with plenty of images to fussy cut. The Nomad Collection has lovely desert hues that mesh perfectly with this old wedding photo. 
 My youngest brother was married while I was living in Italy. Despite being 5 months pregnant I wasn't about ready to miss the happy occasion. I flew half way round the world to be there. 
 The floral spray in the upper corner is layered with fussy cut feathers from the Nomad Collection. The die-cut feathers are from Calambour's Travel Collection. I just love papers with vintage script!
The dream catchers in the lower corner are variations of the same image. I fussy cut each one and stacked them. They are adhered over a vintage hot-air-balloon printed on the base paper, also from the Travel Collection.

Supplies:
Paper:Calambour
Cutting Dies:Amazon
Punch:EKSuccess
Ink:Close To My Heart
Alpha:BoBunny
Tiny Type:Authentique
Craft On

~charity hotrum~

Saturday, October 6, 2018

Fairy Palace With High Impact Paint

Today's show -n- tell starts as a 3-D wood puzzle and ends a Fairy Palace with Tattered Angels High Impact Paint. For a detailed tutorial including construction tips stop by the
 The intricate details on the towers and walls are made with Calambour: Touch 3D Glossy Effect. This water based gel can be applied with a paint brush or through a stencil with a palette knife. Several hours are needed for drying time, but the results are stunning.
 Here Ducat Gold is applied through a Pebbles stencil.
 Light blue was added to the castle walls through another Pebbles stencil.
 The upper level of the castle is decorated with Rich Gold through fine, brass stencils.
Calambour 3D Gel and Tattered Angels High Impact Paint are the perfect pairing for this fairy palace!

Scrap On

~charity~

Monday, August 27, 2018

How To Layer Llamas for a Stunning Page

Today's layout is a shining example of how to layer llamas for a stunning page. Paprika paper collection from Photoplay Paper is bright and cheery and scattered with merry llamas. With a bit of texture and a few added die-cuts the whole layout has a happy feel.
~ Shine ~
 I started the background texture for this layout with Rub-ons, Calambour 3D Gel, Nuvo Embellishment Mousse, and tissue paper images.
 A couple layers of gloss medium and lots of drying time secured the edges of the tissue paper.
 The photo mat started with patterned paper and finished up with a flourish of product packaging. I even made a few clips with ribbon ends.
 I left the edges of the photo mat loose, only adding glue to the center so that I had room to scatter stickers and paper shapes around the edges.
The orange blossoms and tissue paper leaves at the edge of the photo are separated with stacks of craft foam.
The laser cut chipboard was rubbed with Nuvo Embellishment Mousse then layered over the orange blossoms with a few drops of Best Glue Ever.
A variety of die-cut doilies are stacked at the corners of the photo mat and interspersed with the blossoms. 
The lacy edges of the doilies are echoed in the white outlines of the flourish on the photo mat base. The llamas add a touch of whimsy while the triangles of mandala set this layout apart. The lime lace and matching chipboard and the final touch of spice.
Supplies:
Cardstock:Crafters Warehouse, Craftsmith
Patterned Paper, Stickers, Alpha:Photoplay Paper
Product Packaging, Rub Ons:Ranger
Ribbon:Vintage, Thrifted
3D Gel and Tissue Paper Images:Calambour
Embellishment Mousse:Tonic Studios
Stencil:Momenta
Gloss Medium:Tattered Angels
Paper Clips:7gypsies
Brad:EchoPark
Doily Dies:Peachy Cheap, Crafter's Companion
Doily Punch:Martha Stewart

Craft On!

~charity~