Wednesday, December 31, 2014

Wonderful

Kreaxions Team Reveal Day
Stop by the Just Imagine Blog to see what we are thankful for.
~ Wonderful ~ 
I can always answer that my kids are what I am thankful for.
I love them dearly...their happy spirit makes them a lot of fun to parent.
Supplies:
Paper, Stickers, Title:Bo Bunny
Card Stock:Bazill
Glitter Glue:Ranger
Brads:Recollections
Trim:Memorable Seasons Kit
Punch:Kreaxions #312, Insert A and Insert C
 
Sketch:
(Flipped Horizontally)
Bev Code
 
Scrap On!
 
~charity~

Saturday, December 27, 2014

Perpetual Calendar

December Special Ops is up on the SWAT blog!
Stop by for the instructions to turn a frame into calendar that features the kids artwork!
The kids were playing school when I slipped them this project.
They called it art class and quickly decorated their months and numbers.
Now we have a fun calendar/birthday reminder to send to Grandma!
I love getting out my punches and used quite an assortment to embellish this project.
I even did a little fussy cutting and used a few dies.
 
Supplies:
Paper:Craft Smith Co.
Loose Glitter:Martha Stewart
Twine:Twinery
Glitter Paste:Bo Bunny
Mask:Momenta
Dies:Momenta, Lawn Fawn
Punches:EK Success, McGill, Martha Stewart, Stampin' Up, and Kreaxions
 
Scrap On!
 
 ~charity~

Thursday, December 25, 2014

Peace On Earth

If you are feeling the crafting urge and have some time on your hands, start on next years Christmas cards! It's so much more fun to make cards while you are in the Christmas mood.
~ Peace on Earth ~
Making doilies using Kreaxions 4-in-1 punches is so easy.
Here I cut a four inch circle with a one inch center from green paper and a 2.5 inch circle with a 1.25 center from gold paper.
I marked the back of the green circle into 8 sections using the Kreaxions stencil.
Then I punched each line with Punch #914 using the 8cm outer circle Positioning Parts.
I used pop dots to layer the gold ring under the holly wreath and tied a bit of red trim to the top.
Stop by the Just Imagine Blog for links to purchase these tools.
 
Supplies:
Paper:Craft Smith Co.
Trim:May Arts Ribbon
Punches and Circle Cutter:Kreaxions
 
Scrap On!
~charity~

Monday, December 22, 2014

Candlelight Service

The kids have become quite close with the assistant pastor. He was SO pleased with them for taking the effort to dress up for the Candlelight Service. He insisted on a photo.
All the lights were low in preparation for the service, but we arranged ourselves next to the tree in the foyer for a picture. The result is a bit grainy with very soft edges. But it captures us well. 
~ Candlelight Service ~
The texture of the burlap and the glint of the foil paper echo the lights of the tree behind us and the underdeveloped effect of the photo. Stamping directly on the burlap leaves a light impression but heated embossing powder makes the flourishes stand out.

Supplies:
Burlap and Paper:Craft Smith
Flowers:Prima and Paper Studio
Ink:Close To My Heart and Color Box
Embossing Powder:Wow
Gems:Teresa Collins and Michaels
Alpha:Little Yellow Bicycle
Tiny Type:Authentique
Punches:Martha Stewart and McGill
 
Scrap On!
 
~charity~


Sunday, December 21, 2014

All is Calm

My favorite church tradition at Christmas is the Candlelight service. I love the singing, the sweet children's story and then all the lights go out. As the candles are being lit down the rows of pews we sing Silent Night.
Tears in my eyes EVERY time.
So beautiful!!!
 
~ All is Calm ~
Trying to capture the simplicity of this photo was my first goal.
I was inspired by the star of Bethlehem, the simple shepherds, and the moment of waiting.
Foil is notoriously difficult to capture with a camera so I have taken this photo from two angles.
I wish I could show this too you in person. The shine of the foil against the kraft background is a perfect illustration of what the Christmas story is all about!
 
Supplies:
Paper:Craft Smith
Punches:Kreaxions #919 and #920
Title:Silhouette Cameo
Glitter Paste:Bo Bunny
 
Scrap On!
~charity~

Saturday, December 20, 2014

Enjoy Life

Drill #46 is up on the SWAT blog:
 
As a family we don't seem to cheese well for the camera.
Ask for a smile and you are more likely to get a very strained look.
Being well aware of our deficiency in this area we have invented the laughing pose.
~ Enjoy Life ~
 
Someone starts us off and we giggle away, egged on by each others laughter. The photographer snaps quickly and we all hope at least one of the pictures will turn out. Usually we get a series of photos that are enough to make the grumpiest person smile.
 
Supplies:
Paper, Glitter Paste:Bo Bunny
Punches:Fiskars, Martha Stewart
Enamel Dots:My Minds Eye
Metallic Rub:Inka Gold
Title:Trim Craft
 
Scrap On!
 
 ~charity~
 

Friday, December 19, 2014

Count Your Blessings

Making family gifts is one of the best perks of being a crafter.
Tailoring an item to a persons specific likes is so satisfying!
~ Count Your Blessings ~
Last year my Brother sent me train tickets to visit for Christmas week.
On Christmas day Mom, my delightful SIL Hillary, brother Pete, and I went to Manito Park
We got some FABULOUS photos together. They even snapped one of Pete and I laughing.
Mom dearly loves photos of her children so I trimmed them to fit the little compartments in this shadow box and added ribbon and buttons.
On the outside of the box I used a Christmas line from Echo Park.
Stickers from the same line are in the compartments.
 
Hope this inspires you to create for your loved ones!
 
Scrap On!
 
~charity~

Wednesday, December 17, 2014

Folding Photo Display

A good friend of mine sits at a desk all day, playing with computers.
This years gift is something to brighten up his corner!
This photo display is decorated front and back and folds neatly for shipping.
For the back I used burlap and the adorable winter scene in white from Craft Smith's Timeless Holiday collection. I embellished with Stickles and added titles from the same paper pad. Gold Star washi tape from Japan covers the edges and helps with the folding.
Inside the display I used several papers from the Timeless Holiday collection.
I used red snow flake paper as the base, holly in two designs for a central layer, and green plaid paper with a thin edge of red snow-flake paper for the photo mat.
I edged each layer of paper with Inka Gold Metallic Rub.
Here are a few close-ups of the binding décor.
The scene with children building the snowman is just too sweet!
The red burlap is from Craft Smith's Holiday Burlap paper pack.
 
Scrap On!
 
~charity~


Tuesday, December 16, 2014

Sipping Together

Travelling as a family means multiple stops for Coffee.
This photo was taken at Starbucks near Niagara Falls.
We LOVED seeing the Falls in winter, but the cold sent us in for something warm to drink!
~ Sipping Together ~
This is my entry for the
December Scrappy Friends Challenge
For Rochelle's Tic-Tac-Toe Challenge I used the Center Vertical Row:
Stamp, Snow Flake, Overlay
For Kelly's Word Challenge I used "together" in my title.
Brenda offered this month's Sketch Challenge:
 
Supplies:
Paper, Alpha, Stickers, Flowers, Stamp: Bo Bunny
Ink:Close To My Heart, Color Box
Embossing Powder:Wow
Bling:Teresa Collins
Brads:Scrapabilities
Overlays:Crate Paper
Mettalic Rub:Inka Gold
Mist:Ranger
Trim:Memorable Seasons Kit
Punches:Fiskars & Kreaxions #312
 
Scrap On!
 
~charity~

Monday, December 15, 2014

Poinsettia

Paper Girls Challenge #70

I so enjoy making ornaments each year.
Sometimes the kids help, other times I am on my own.
This year I enlisted the cat!
The star ornament is a series of cut outs from a hexagon paper by Craft Smith.
It's a simple project that gives the tree that home-made-with-love feel.
The circular ornament I made using Kreaxions Punches.
Chris featured this type of ornament in Kreaxions recent blog hop.
Check out HER BLOG for instructions!!!
The Poinsettia I also made from Craft Smith hexagon paper
(The Holiday Elegance Paper Pad).
My sweet little boy was fascinated with the poinsettia and decided he should make one also.
Here are the instructions he followed:
Step 1:Cut 12 diamonds from the hexagon paper.
Step 2:Cut an 1/8 inch off the edges of 3 of the diamonds. Cut a 1/4 inch off the edges of 3 of the diamonds.
Step 3: Use ink or other product on the edge of each diamond.
Step 4: Role the petals on a marker to get a nice curve.
Step 5: punch a 1/2 inch circle and a 1/2 inch snowflake. 
Step 6: Crease one tip of each petal, about 3 stripes up.
Step 7: Adhere 2 of the large petals to the circle, directly across from each other.
Step 8: Adhere the remaining large petals on the circle do that they are spaced evenly.
Step 9: Adhere the medium petals on the large petals. Spaced evenly. 
Step 10: Adhere the small petals on the medium petals. Spaced evenly. 
Step 11: Press the points of the snowflake up.
Adhere to the center of the Poinsettia. 
Step 12: Lace a piece of twine through one of the petals.
Knot at both ends, for an ornament hanger. 
Supplies:
Paper:Craft Smith Co.
Twine:Twinery
Metallic Rub:Inka Gold
Punches:Kreaxions, Fiskars, & Uchida
 

Scrap On!

~charity~


Thursday, December 11, 2014

Snow and Holly

I've been having so much fun making ornaments this year.
I've been using paper by Craft Smith Co. and enjoying the quality and color schemes.
These ornaments combine 2 other loves of mine:
Altered Items and Kreaxions Punches!!!
Circle Frames
Save an empty Morton's Salt container (26 oz.).
Mark a line around the container 1" from the end. Cut with a craft knife.
Paint inside and outside of cardboard black.
Cut a circle of paper to place in the bottom of the frame.
Punch a hole 1/2 inch from the edge of the frame with a paper piercer.
Add a loop of twine, tying a knot to keep it from slipping through.

Star Insert
Cut a second circle in a contrasting color.
Using a protractor mark 5 sections at 72 degrees each.
Punch on each line with Kreaxions 4-in-1 Punch #914 or #312.
Trim an 1/8 to a 1/4 circle of paper from the edge so that the contrasting paper in the back of the frame shows through.
Adhere the star to the circle frame with 3-D foam adhesive.
Embellish with glitter glue.

Scrap On!

~charity~


Saturday, December 6, 2014

Be Happy, Be Bright, Be You

SWAT Drill #45
This months mood board is all about snow and sparkles and bits of blue sky. I love working with white pigment ink and embossing powder so I found a complimentary photo and embossed away.
~ Be Happy, Be Bright, Be You ~
I just love all the positive title and quote images posted on Facebook and Instagram. I saw this one and couldn't wait to create a layout to go with it! 
The distressed chipboard gear is actually a cut away from the Circle Links chipboard by Blue Fern Studios. Since this layout started with a Steam Punk feel I dressed up my chipboard to go along with it. First I patted with Medium Blue pigment ink. Then I scattered white embossing powder, but sparingly to leave a crackle look. Finally I inked the bit of chain with Cobalt Blue pigment ink, "stamped" it along the gear, and embossed with a clear sparkle powder.
 
This is my entry for Blue Fern Studios December Challenge.
 
Supplies:
Paper:Pink Paislee, The Paper Studio, Darice
Embossing Powder:American Crafts, Stampendous, Wow
Pigment Ink:Color Box, CTMH
Stamps:CTMH, Inkadinkado, Stampin Up
Flowers:Prima, The Paper Studio
Cork and Brads:The Paper Studio
Stick Pins:Little Yellow Bicycle
Texture Gel:Liquitex
Tint:Lindy's Stamp Gang
Chipboard:Blue Fern Studios
 
Sketch:
Michele Singh
 
Scrap On!
 
~charity~

Monday, December 1, 2014

Kreaxions Blog Hop

Bev Code's photo.

Beautiful decorations that glitter in the candlelight make the whole house feel like Christmas! Craft a tray of sugared fruit this year or individual pieces to decorate a wreath or the tree.
The fruit is made from an assortment of accordion folded circles using the

Each piece of fruit is made from a single circle of paper and follow these steps:

Instructions:
Step 1:Cut a 4 inch circle from cardstock.
Step 2:Score your circle into 16ths as shown in box 1 and box 2
Step 3:Cut a 1.5 inch circle out of the center.
Step 4:Bunch center of the circle together to create an accordion flower, secure to a paper circle base with adhesive. I use hot glue which looks a tad messy so I add a paper circle on top.
If you make accordion folds from circles 2.5inches or smaller you will need to cut a 1inch circle from the center.
 
Each piece of fruit is a stack of accordion folds (AF) glued to circles.

Here are the dimensions:
Apple and Orange:
1 inch Circle Top with loop of twine threaded.
3.75" AF, 1.5" Circle
4.25" AF, 1.5" Circle
4.5" AF, 1.5" Circle
4.25" AF, 1.5" Circle
3.75" AF, 1.5 inch Circle Base

Lemon and Lime:
.5 inch Circle Top with loop of twine
2.75" AF, 1" Circle
3" AF, 1.5" Circle
3.25" AF, 1.5" Circle
3" AF, 1" Circle
2.75" AF, 1 inch Circle Base

Pear:
.5 inch Circle with loop of twine
2.5" AF, 1.5" Circle
3" AF, 1.5" Circle
3.5"AF, 1.5" Circle
3.75" AF, 1.5" Circle
4" AF, 1.5" Circle
4.5" AF, 1.5" Circle
4" AF, 1.5 inch Circle Base

Grapes and Cherries:
.5 inch Circle with loop of twine
2" AF, .5" Circle
2.5" AF, .5" Circle
2.25" AF, 1 inch Circle Base

Check This Post for a list of supplies.
 
Blog Hop Order:

 
Scrap On!
 
~charity~

Saturday, November 29, 2014

Sugared Fruit

This Holiday Season I'm trying for easy to accomplish with maximum WOW built in. This tray of sugared fruit is made from an assortment of accordion folded circles.
I cut the assorted sizes of circles using the
Although each piece of fruit has a variety of accordion sizes they are each made from a single circle of paper and follow these steps:

Instructions:
Step 1:Cut a 4 inch circle from cardstock.
Step 2:Score your circle into 16ths as shown in box 1 and box 2
Step 3:Cut a 1.5 inch circle out of the center.
Step 4:Bunch center of the circle together to create an accordion flower, secure to a paper circle base with adhesive. I use hot glue which looks a tad messy so I add a paper circle on top.
If you make accordion folds from circles 2.5inches or smaller you will need to cut a 1inch circle from the center.

 
Stop by the SWAT blog to get the list of dimensions for each piece of fruit.
Supplies:
Paper:Authentique, October Afternoon, Carta Bella, Simple Stories
Twine:Twinery
Glitter:Martha Stewart
Circle Cutter:Kreaxions

Scrap On!

~charity~


Friday, November 28, 2014

Silver Lining

The ombre color schemes and textured paper of the Gradients paper pad by Craft Smith co. is a Mixed Media artist dream!!!
I slathered on 9 layers of mist, paint, paste, and ink. Then I cut a hole in the middle, rolled some Posies paper through and attached my photo. Then I added an assortment of embellishments as well as Embossing Powder, Micro Beads, and a final layer of Metallic Rub.
~ Silver Lining ~
The textured surface is still visible, the paper has minimal warping, and the layout can be held by one corner without damage or weakness.
I am thrilled to have this paper and will be using it as a base for many mixed media projects!!!
One last shot of the project's shimmer:
Supplies:
Paper, Title, and Fussy Cut flowers:Craft Smith Co.
Chipboard:Blue Fern Studios
Metallic Rub:Ink-a-Gold
Trim and Flower:May Arts Ribbon
Flower Punch:EK Success
Butterfly Punch:Marth Stewart
Mask:Kite
Modeling Paste:Liquitex
Embossing Powder:Stampendous
Word Stamps:Little Yellow Bicycle
Background Stamp:Stampin Up
Ink:CTMH
Acrylic Paint:Delta Creative
Mist:Heidi Swapp, Tattered Angels, Lindy's Stamp Gang

Scrap On!

~charity~


Wednesday, November 26, 2014

Hello Beautiful

This sunset toned paper is my first love from the
Gradients paper pad by Craft Smith Co.
I just can't get over the glowing colors and ombre shift.
They are just perfect to add happy emotions to this layout of my daughter dancing in the sunlight.
~ Hello Beautiful ~
My inspiration sketch for this piece was an album cover posted by a friend on Instagram! (IG profile: charityhotrum )
The frames and doilies are the layers of buildings. The bright tree that stands out in the middle is my sweet Lori, swinging her foot from the photo frame, and the cut outs of her dancing are the figures of people walking by the tree.
And OF COURSE there's that PINK sky!


Supplies:
Paper:Craft Smith Co
Film Strip Die:Quickkutz
Leaves and Tint:Prima, Lindy's Stamp Gang
Mask:Memory Box, Anna Griffin
Ink:Color Box
Modeling Paste:Liquitex
Glitter Paste:Bo Bunny
Title:Silhouette Portrait
Flower Punch:Martha Stewart
Doilies:Kreaxions Circle Cutter, Positioning Parts, and Punch #920
Mist:Tattered Angels
Stickles:Ranger

Scrap On!

~charity~


Monday, November 24, 2014

3 - Page Mini

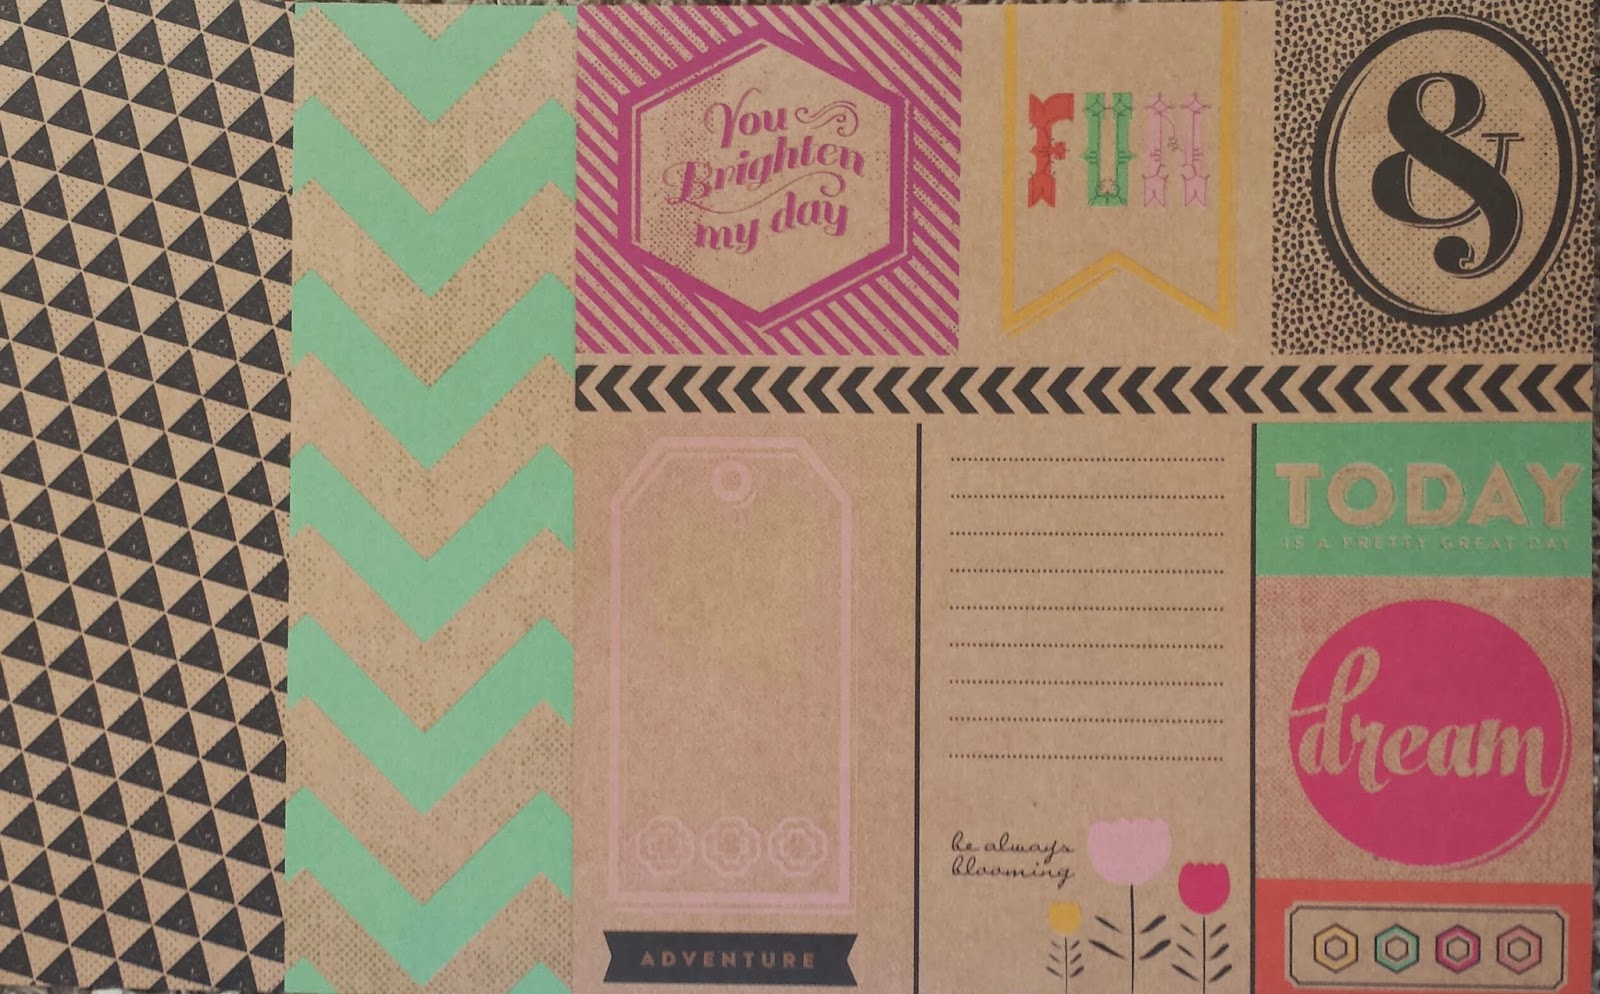
Craft Smith's ~ Type Craft ~ paper pad is full of
happy*bright*cheerful 
colors and designs!
It's just the thing for a quick mini or organizer.
Here's a great tutorial that only requires three 12x12 papers. It's all about pockets, a super functional binding,
and having FUN with paper!
Supplies
3 sheets of Paper including the Journaling Cards
Twine:2 pieces at 25 inches, 1 piece at 10 inches
Adhesive
Brads
Binding and Base
Cut three pieces from this sheet.
The base will be 4.5x6.75
Crease bottom at 1.25 and fold under. 
When folded the piece will be 4.5x5.5
Cut the "always blooming" journal card 3.5x5.5.
Adhere to front of base.
Cut two binding pieces at 5x5.
Crease every half inch.
Fold piece into a single strip.
Pierce every half inch.
Pages and Backing
Trim this sheet into 3 strips: 3.5", 4", and 4.5"
The 4.5" strip is the backing.
Crease it at 1.25, 1.5, 7, and 7.25.
Place the base on the backing, lining the folded end of the base up with the 1.5" crease. Pierce every 1/2 inch starting at the 7" crease.
The 3.5"strip will be three of the pages for the right side.
Cut it into the following lengths:
3.5x4.75
3.5x3.5
3.5x3
Use the following measurements to cut the
Journal cards for the right side:
The 4" strip will be the pages for the left side
and one for the right side.
Trim it into the following lengths:
4x3
4x3
4x1.75
4x1
3.5x1.75
Use the following measurements to cut the
Journal cards for the left side:
Adhere the Journal cards to the corresponding pages. Leave a half inch strip on the edge of the page for the binding as shown in the photo. Carefully place the adhesive around the edges of the cards to form pockets. Add brads to pressure points to reinforce the pockets. Line the pages up with the base, pierce the pages every 1/2 inch.  
 Stack the pieces in the following order:
Backing
Base
Binding
Pages, inserted between creases of the binding.
Stitch the pages to their corresponding sides
using the long pieces of twine.

The pages are designed so that they vary in height and when folded together alternately the tip of each one is visible.
Place a brad at either end of the backing, 1/2 inch from the edge.
Wrap with the small piece of twine to close.
 
 
 Slip notes to Grandma in the pockets and photos of the kids on the backs of the pages. If you just can't bear to give this cheerful mini away use it as an organizer for your shopping lists, receipts, and coupons. Either way the majority of the fun is in making the project from Craft Smiths high-quality papers and fresh designs.
 
Scrap On!
 
~charity~