Wednesday, November 22, 2017

How To Make A Bright Wreath With Colorful Streamers

I used Rinea Foiled Paper to make a wreath with colorful, bright streamers. Shiny decorations seem just the right touch for winter holidays. This wreath is wrapped in Christmas colors and looks so inviting on my porch.
 ~ Pine Cone Wreath ~
 Directions:
Step 1. Wrap wreath form in Mocha Foiled Paper
I had old, dry pine cones with very little weight. I used a 1/2" cardboard ring with a 9" center. Fresh pinecones are quite heavy and will require a wire or styrofoam wreath form. I had scraps from making the Dragon Wings to wrap the form with. I cut 1/2" strips and secured the ends with tape.
Step 2. Cut wire and wrap around pine cone.
As you can see, my pine cones are very light in color. I tried bleaching them. Although it isn't quite a Pinterest fail, they certainly aren't the gorgeous color I was hoping for. They do make a great backdrop for the foiled paper.
 Step 3. Secure pine cone to wreath with wire ends.
I used 12" of wire for each cone. However, with a thicker or larger wreath form that number may need to be adjusted. Be sure to use wire cutters.
 Step 4. Cut strips of foiled paper, 2" wide.
This project is definitely made easier by purchasing Rinea Foiled Paper in rolls. I used 144" of streamers. To do so I had to cut three lengthwise strips of  Emerald Starstruck Paper and three lengthwise strips of Silver Starstruck Paper. I also used a border punch along both sides of my streamers. I love Christmas Trains and this Martha Stewart punch delivers!
 Step 5. Wrap streamers around wreath.
I wrapped the green first then the silver, securing the ends with tape.
 This wreath will not store well so I made the streamers removable. To do this I placed tape on the wreath form where I wanted to attach my streamers. When the season is over the streamers will detach easily from the pre-taped surface.
 Step 6. Cut 4 strips of foiled paper 2x12" and 1 strip 2x6". Roll and secure.
I secured my rolls with tape runner and a 1/2" overlap. I wanted lots of contrast and a continuation of the Christmas theme so I used Ruby Starstruck Paper.
 Step 7. Stack rolls and secure through center with a brad to assemble bow.
I used a paper piercer to mark each roll at the center. Be careful not to crease the ends or you will have a very flat bow.
 Step 8. Attach bow to wreath.
I attached my bow to a green streamer with the brad. It hung down a little so I added a couple dots of hot glue. This will make it hard to remove when it comes time to store it. But I will think of something.
Supplies:
Foiled Paper:Rinea
Brad:Spare Parts
Punch:Martha Stewart

Scrap On!

~charity~

Saturday, November 18, 2017

How To Make Hair Dye Mistakes Disappear

I love using brightly colored semi-permanent dyes on my hair. The down side...blue or purple ear tips. The instructions are clear about adding a layer of petroleum jelly to the hair line and ear tips. Somehow I still get dye on bits and pieces of me. 
Most recently I smeared it on my arms while I was reaching for the nape of my neck. Don't judge my photos too harshly, I always dye my hair just before sleeping, the lighting was dreadful!
One of the design team members had used ScraPerfect's solvent to remove stains left from permanent color. I though, why not try it with semi-permanent. I spritzed Best Cleaner Ever on my arms and let sit 10 minutes. I washed with dish soap and
💥 POOF 💥 
my purple stains disappeared.
As in COMPLETELY gone!!!!
I have never been so ecstatic, or so clean after a dying episode! (😏)
I have tried MANY cleaners to remove those stains in the past. Coconut Oil works the best but still takes several applications.
When I use the Best Cleaner Ever I know I am not absorbing dangerous chemicals with my skin. This product is:
Non-Toxic
Non-Hazardous
Biodegradable
and it has 
No Harmful Fumes.
I'd say that's a WIN WIN situation!
Stop by the ScraPerfect online store and have some on hand for your next hair dyeing experience.

Scrap On!

~charity~

Tuesday, November 14, 2017

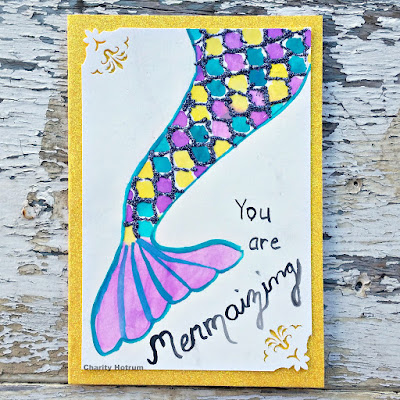
How To Make An Attractive MerCard With Vibrant Colors

This attractive MerCard is painted with vibrant watercolors . The hand-drawn detail is enhanced by a touch of glitter.  This is just the thing for that special water sprite in you life that needs a pick-me-up.
~ Mermaizing ~
Directions:
Step 1: Cut a piece of watercolor paper to 4x6".  Draw a mermaid tail. 
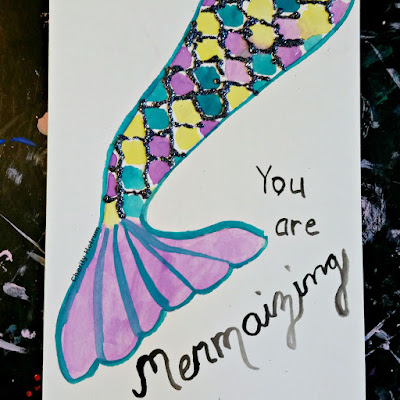
My first try, as you can see, was quite wobbly. No worries. With an eraser that all changed.
 Step 2: Paint scales on tail with watercolors. 
A stencil helps separate colors, but dots can be painted for a similar effect.
 Step 3: Use Best Glue Ever to trace the lines between the scales. Dust card with glitter.
Step 4: Add sentiment to the card front.
I hand lettered mine with water colors. If you aren't so sure of your handwriting use stamps or Tiny Type.
Step 5: Punch corners with decorative punch.
Step 6: Attach Card Front to 6.5"x 4.5" card base.
I used thin strips of Best Glue Ever. As you can see, no warping of the cardstock!
This hand made card is as much a work of art as it is a paper craft. Don't stress about getting the colors or lines exact. Just enjoy the process.

Stop by the ScraPerfect Blog for more ideas!
Supplies:
Watercolor Paper:Artist's Loft
Cardstock:DCWV
Watercolors:Close To My Heart
Corner Punch:Kreaxions
Glitter:Martha Stewart
Glue:ScraPerfect

Scrap On!

~charity~

Wednesday, November 8, 2017

How To Make An Unusual And Attractive Window

This tutorial for how to make an attractive window is unusual because it is made from foiled paper. I love the look of stained glass and Rinea Foiled Paper gives me the opportunity to do that simply and quickly. Follow along with the steps below to make your own shimmering decor!
~ Foiled Koi Window ~
 Step One: Print or draw a pattern for a stained glass window.
Choose a graceful image that can be broken into parts with simple lines. I chose a Koi fish. Pinterest and Google abound with free patterns for Stained Glass windows. I found it just as easy to draw my fish and sea weed on whiteboard paper. By using a dry-erase marker I could easily erase and re-draw till I got my lines just so.
 Step Two: Trace and Cut pattern from foiled paper.
I cut my Koi from Rinea Marigold Start Struck paper. The back fin is from Rinea Mocha Glossy paper and the sea weed strands are Rinea Emerald Star Struck paper. I added details to the fish and the fin with Rinea Ghost Ink. For the scattering of scales I used a quarter foil stencil. 
 Step Three:Cut window paper and adhere to backing.
My window is cut from a roll of Rinea Silver Star Struck paper. I used an 11"x14" piece of cardboard. I wanted my foil base to be rock solid AND I wanted to see the window frame without using lines or separate pieces. To get this look I used inch wide super sticky tape. 
 Getting the foiled paper onto the cardboard base without mistakes took steady hands and a good game plan. I cut my silver paper to 12"x15" size. With a 1/2 inch of playroom on each side I had a good chance of getting the cardboard covered even if it was a tad crooked. I rolled the foiled paper then laid it on the cardboard as straight as I could. I started at the top, rolling toward myself,  and pressing the paper into the adhesive as I went.  I folded the excess to the back of the cardboard.
 Step Four: Glue designs to window base.
I used Best Glue Ever and a No-Clog Writing Cap to be certain my glue went where I wanted it to and that my pieces stayed put! These ScraPerfect products always make my project a success.
 Step Five: Mix 1 part black acrylic paint to 3 parts all purpose glue for window leading.
The glue mixture is grey when wet. Remember to use a glue that dries clear. When it does you will have lovely, thick, black lines. I did not leave enough room in my squeeze bottle to shake the mixture and had to use a bamboo skewer to mix it. This made the process more difficult then it had to me. Just an FYI.
Step Six: Outline all joints and paper edges with leading mixture, leave to dry.  
  The leading proved to be my Achilles heel. I started with a craft blond glue and paint mixture. The craft bond was too thick and ran unevenly. I had to scrape off bits of leading and start over. I was so FRUSTRATED that I had to put my project aside for a day. I made a second mixture of Elmer's Glue-All and black acrylic paint. This ran smoothly. I tested it out to get the right line thickness and was back in business. 
To clean up the smears and glue overage I used Best Cleaner Ever. This eco-friendly solvent removed the dull patches on my foiled paper without damaging the paper or affecting the color.
Supplies:
Whiteboard Paper:DCWV
Foiled Paper and Ghost Ink:Rinea
Adhesive Tape:American Crafts
Glue, Solvent, Writing Cap:ScraPerfect
Acrylic Paint:Deco Art
All Purpose Glue:Elmer's
Stencil:Kite

Scrap On!

~charity~