Sunday, September 30, 2012

Photo Kiosk

Little Girls and Photo Kiosks are quite the pair. Here my daughter and her bestie perform for the camera after getting their ears pierced. 

Supplies:
Paper and Alpha:Authentique
Stars:Maya Road
Washi Tape:Target
Canvas Buttons and Ink:CTMH
Stickles:Ranger
Stamps: MME & Pink Paislee
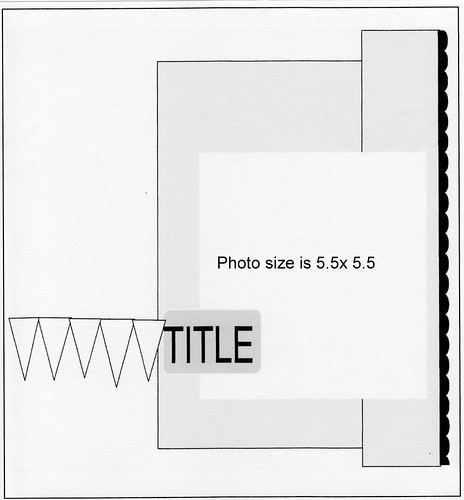
Sketch:
 
~charity~


Saturday, September 29, 2012

Make It Work

The latest challenge at the My Mind's Eye blog is to create a Layout and then a Card inspired by the Layout. But, you know me, I'm a bit of a rebel. I made a card THEN a layout inspired by the card. Do you think they'll let me enter the challenge anyway? :)
~ Happy Day ~
 
Although most of the supplies I used to make the card are MME, I did use a few bits and pieces from other companies. The Ink and Gems are CTMH. The yellow twine is from The Twinery, and the yellow trim is from my stash.
I can do it All By Myself ~
My adorable little boy was quite determined to climb up on this mushroom without any help. He was so funny about it that I just had to get photos of the process.
Supplies:
Yellow Twine:The Twinery
Alpha:Cosmo Cricket
Gems and Ink:CTMH
Stickles:Ranger
Zipper:Stash
All Else:My Minds Eye
 
~charity~

Friday, September 28, 2012

Craft and Lime

A couple more cards today for my teacher stack.
Still using Graphic 45, but this time I've combined it with my favorite accent color...
***LIME***
Supplies:
Paper:Graphic 45
Gems:Theresa Collins Blingage
Flowers:Imaginisce
Ink and Dimensional Paint:Ranger
Washi:Up and UP for Target
Doilies:Stash
 
~charity~

Thursday, September 27, 2012

Deep Blue Summer

The deep blue of the water contrasts sharply with the sun-dried hills in this photo. It matched the Homespun stack from DCWV perfectly. With a minimum of embellishment the paper and photo were left to work their magic in tandem.
 ~ Deep Blue Summer ~
Supplies:
Paper:DCWV
Punch:EKSuccess
Trim:May Arts
Alpha:American Crafts
 
~charity~

Wednesday, September 26, 2012

Thank You Cards

Time to delve into my ever growing paper stash and make a few thank you notes as teacher gifts.
These are made with a simple sketch in mind
and a whole lot of glitz.
 Of this four card set, this one with the
peacock feathers is my favorite.
Just something about their classic shape combined with purple and teal glitter. 
Supplies:
Paper:Graphic 45
Trim:My Mind's Eye
Ink and Stickles:Ranger
Tiny Type:Authentique
 
~charity~

Tuesday, September 25, 2012

MistScape

Practical Scrappers is illustrating the many uses of mists and alcohol inks today. One of my favorite uses for mist is to layer several colors to make a landscape.
~ Life is not measured by the breaths we take,
but by the moments that take our breath away ~
Supplies:
Dragonfly, Tattered Leather, Patina,
and Gumdrop Mist:Tattered Angels
Paper: MME
Flowers:Petaloo
Alpha:American Crafts
Tiny Type and Words:Authentique
Transparency:7 Gypsies
Gold, Black Diamond, Lagoon Stickels: Ranger
Trim:Kieffer's
 
~charity~
 

Monday, September 24, 2012

Sandy Blond

A new set of Mid-Week Mojos has begun at Scrapbook Steals.
These 10 sketches will be the Coral series. Come play along with us at:
~ Sandy Blond ~
Supplies:
Paper:Lucky Seven Factory
Trim:Stash
Ink:Ranger
Washi:Target
Chipboard:My Minds Eye
Alpha and Brads:Basic Grey
Twine:Doodlbug Design
Hinges:EK Success
Staples:Making Memories
Sketch:Coral 1
Kristy Lee for Scrapbook Steels
 
~charity~

Saturday, September 22, 2012

Like a dog loves his Tongue

There are few things that spell out happiness more clearly than a dog running full tilt with his tongue hanging out. Such a photo deserves bright papers with cheerful motifs. That would be the perfect description of MME Lime Twist. Luckily I have LOTS!
~ Like a dog loves his Tongue ~
Supplies:
Paper and Pearls:MME
Gems and Ink:CTMH
Twine: The Twinery and MME
Trim:Stash
Alpha:American Crafts and Basic Grey
Tiny Type:My Little Shoe Box
 
Sketch:Erica Bass
 
~charity~

Friday, September 21, 2012

XOXO

It has been said that the use of white space is a difficult skill to obtain. That may be, but these simple, yet colorful papers sure make it look effortless. The tiny flowers are punched from a corresponding sheet of paper and make adorable handmade embellies.
Supplies:
Papers and Vellum Titles:DCWV
Yarn and Buttons:Stash
 
~charity~

Thursday, September 20, 2012

Shine On

Another post for Practical Scrapper's Frugal Finds.
The "find" for this month is a jar lid.
I took this one off the applesauce jar.
Shaker Box Instructions:

Step 1: Trace lid onto a transparency, cut out and set aside.
Step 2: Write letter in pencil on lid, punch holes, erase extra marks.
Step 3: Stitch lid to 4x6 piece of cardstock. 
Step 4: Add confetti to lid, place transparency circle over the top. The edges of the lid will hold the transparency in place.
Step 5: Adhere cardstock to a 4x6 card base then secure with brads.
This card is also my entry for this weeks challenge at Use It Tuesday:Anything Goes.
I've had the star confetti sitting around forever. At least 4 years!!! I guess it is time to let it grow up and go out into the wide world.
Supplies:
Paper:Graphic 45
Alpha:Making Memories
Star confetti twine and brads: Stash
Applesauce Jar Lid: Motts
 
~charity~


Wednesday, September 19, 2012

My Diva Moment

Practical Scrappers frugal finds day
and have I got a stunner for you!!!
This MME paper is my fav from the first round of Lost and Found.  It's got the glitter, the red and black, and the eiffel tower. I definately need to be a part of THAT scene.
~ My Diva Moment ~
The gorgeous flowers on this page were made from simple ingredients and household items.
You will need:
One 20oz coke bottle cap
One 1/2 inch button
One 7 inch piece of twine
Seven 2 inch circles punched from vellum
Pierce two holes in bottle cap using the instructions found in this post:
Step 1.Thread needle with twine and set aside.
Step 2. Place button in the center of one vellum circle and pierce holes for the twine.
Step 3. Stack the 6 remaining vellum circles and pierce 1/2 inch from the edge.
Step 4. Place first vellum circle on paper piercer and then add 6 remaining circles. Fan out the circles so that they complete a circle around the first vellum circle.
Step 5. Hold vellum firmly, remove paper piercer.
Step 6. Run needle and twine through bottle cap, vellum circles, and button so that button will be inside the cap when the twine is pulled tight. Run twine back down through second button hole, vellum, and bottle cap.
Step 7. Press button into bottle cap and tie tightly with two knots. Leave twine ends for attaching flower to project.
Step 8. Fold vellum down around the bottle cap to resemble a flower.
Step 9. Attach to project by piercing corresponding holes in cardstock and tie twine ends. After attaching use a little hot glue to hold the bottle cap firmly to the page. Otherwise it wobbles a bit. 
Supplies:
Paper, Twine and Alpha: MME
Gems: Jolees and MME
Black Diamond Stickles: Ranger
Buttons: Basic Grey
Leaves: Prima
Ink: Stampology
Punch and Vellum: CTMH
Sketch:Creative Scrappers #225
 
~charity~


Tuesday, September 18, 2012

Scrapfest

I had the thorough enjoyment of going to Scrapfest this year. Archivers puts on quite a show and this year was no exception. Saturday night I went to the crop sponsored by Graphic 45. I met these three ladies there and shared some laughs! Graphic 45 was very generous as was Archivers. Definately on my to do list for next year!
Supplies:
Papers:G45
Alpha:American Crafts
Gems and Ink:CTMH
Trim:Stash
Rub-Ons:K and Company
Mist:Tattered Angels
Punches:EK Success, McGill,
We R Memory Keepers, CTMH
Sketch:
for Scrapbook Steals
 
~charity~

Monday, September 17, 2012

Cake-a-Licious

Paper Girls Challenge #16 is baby themed. Scrap your baby, weather it's the human kind, a fur baby, or even your prize pumpkin! We want to see it.
This sweet baby is so happy she could cry! Maybe cake is NOT her thing.
Supplies:
Paper:DCWV, Homespun Stack
Thread:Coats and Clark
 
~charity~


Saturday, September 15, 2012

Transparency Flowers

 
I'm all about flowers made from transparencies today. Check out the steps to make these flowers, then follow this link over to the Practical Scrapper's Blog and view two more tutorials!
Transparencies come in various sizes, colors, prints and pre-designated uses. I like to make flowers from transparencies with an all over print. You will need a jeweled brad, a pair of tweezers, a heating tool, and a paper trimmer or pair of scissors.
First cut 4 strips measuring 2 ½ by ½ inches. Pierce each strip at the center. Thread each strip onto a brad so the arms spread out like an asterisk.
Using tweezers, grasp the brad by the “feet” and hold it upside down. Turn on the heating tool and warm the transparencies for 5-10 seconds. It will quickly become pliable. Use your fingers to mold the strips into a curved shape, bent toward the brads jeweled center. The strips may need reheated a few times to get the curve you have in mind.
To make a smaller flower try cutting strips that are 1 ½ inches by ½ inch. Give the strips a shallower curve so the flower has a more open appearance.
What’s a scrapper to do if a heating tool is nowhere to be found? Here’s a second flower option. For this one you’ll need a print transparency, a jeweled brad, and a paper piercer.
Cut 4 strips 3 ½ by ¼. Pierce each strip in the middle and ¼ inch from each end.
Thread a strip onto the brad using the center piercing. Bend one side of the strip in and thread it onto the brad, bend the other side in and thread it onto the brad. Repeat this process for all four strips, taking care to turn each strip so that the flower petals form an asterisk.
These flowers are lots of fun to add to any crafting project, but look especially snazzy on gift tags!
After you have completed your flower cut a 3 inch circle from card stock. Pierce the center and insert the transparency blossom. Fold the brad back securely. Punch a small hole ¼ inch from the side and thread about 6 inches of twine through in a slip knot.
This tutorial was first featured as a Scrapbook Steals How To'sday.
See that blog post here:
 
  ~charity~
 

Friday, September 14, 2012

Furbaby

I received the Coral Couture stack for my part in the DCWV/May Arts Craft Challenge, but haven't had a chance to use it yet. This months Stack-a-holic Challenge at DCWV seemed the perfect opportunity.
I rearranged the banners on the sketch and reduced the number of photos to two.
But truly, this is my entry!
Supplies:
Paper:DCWV
Trim:Stash
Twine:The Twinery
Pearlescense:Hampton Art
Punches:EK Success
Ink:Ranger
Alpha:American Crafts
 
~charity~
 

Thursday, September 13, 2012

"hello"

Just a quick little card using a bit of fussy cutting and twine.
These sweet birds seem to be enjoying their morning and each others company.
Supplies:
Papers:DCWV
Twine:The Twinery
 
~charity~
 

Wednesday, September 12, 2012

Sandy Toes

This months product and sketch challenge at Paper Secrets combines an artsy sketch and fabulous Authentique products. I decided to mix and match collections to illustrate these
photos of my son at the beach.
~ Sandy Toes ~
The stickers and images from the Loyal collections made excellent embellishments for this page. I used dimensional adhesive to give the cluster in the lower right depth. I also laceded the edges of the paper using MME twine. 
I've had a serious crush on the shapes of Voyage since my first encounter with the Journey collection. Just a little fussy cutting and an instant exotic feel surfaces.
Think Taj Mahal and flowing fountains.
 I printed the photo of my sweetie in black and white and in color then matted it with an additional photo of footprints in the sand. To make the mat for the photo on the right I cut individual flourishes then fanned them out. 
To enhance these amazing, flowing shapes I added dots of Enamel Accents by Ranger. I also sewed the photos directly onto the page. A large black gem by MME and title using Basic Grey alphas finished off the page.
Sketch by Page Drafts
 
~charity~


Tuesday, September 11, 2012

...But who's counting?

This photo was taken by my DD just before we headed out to a dinner to celebrate the accomplishment of some of DH's coworkers. He looks so spiffy in his Mess Dress.
~ 12 Years ~
Supplies:
Paper: MME and Webste's Pages
Alpha: American Crafts
Tiny Type: MME and Authentique
Twine: The Twinery
Netting and Heart Embellie: Webster's Pages
Bird Die Cut: Prima
Resin Accents:Recollections
Buttons, Findings, and Purple Ribbon: Stash
~charity~

Monday, September 10, 2012

Summer's Bounty

Another week another MME project! The first MME challenge for September is to document "The End of Summer." For me that is the time I collect the seeds from my flowers for planting next year. My hollyhocks are always stunning and this year I decided to share their seeds with my Mom. My flower garden is my pride and joy so only the best will do for seed sharing. That means MME products and a
cool new project and packaging.
For this project I decided to make a book to hold the seeds. (More surfaces to decorate!) I used Follow Your Heart, Lost and Found 2 and Sweet Caroline embellishments and paper for this project as well as CTMH ink for the paper edges.
As Summer fades into Fall it leaves us with a bountiful harvest to enjoy. I used the train image to symbolize the changing of the seasons. I added some silver net trim from my stash and came up with a folding technique to hold the Octagon seed "pages."
The pages are made with 3 inch octagon frames. The windows of the Octagons are cut from Lost and Found 2 transparencies. The backs of the pages are framed photos of the flowers the seeds will grow. Each packet of seeds has an additional flower tab so they don't get confused.
The final page in the book is a shot of my beloved flower garden. It is right outside my kitchen window so that I can look out on my lovelies while I'm at my chores.
 
~charity~