Saturday, January 30, 2016

Snow Owl

Today is reveal day on the Just Imagine blog. Stop by and see how the other team members have interpreted this months theme:
Winter Blues
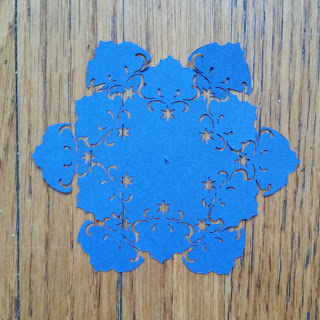
I love this snowflake paper from the Craft Smith paper pad Crystal Frost. 
It pairs perfectly with Kreaxions punch #312.

~ Snow Owl ~
For this card I punched two 6" strips of paper to frame the center of the card. I also punched the top and bottom edge of the center piece using insert A to make #312 into a border punch. 

Supplies:
Paper:Craftsmith, My Minds Eye
Flourish Die:Echo Park Paper
Metal Charm:Momenta 
Ink:Close To My Heart
Punch #312:Kreaxions

Scrap On!

~charity~


Monday, January 25, 2016

Romance on a Dime

With my oldest girl in High School I have been catapulted into the world of boyfriends and strong emotions. When the one-month anniversary came up I got the panicked, 
"Mom!!!!!! Help me plan something, help me decorate!" 
With 2.5 hours to go this is what we came up with:
Horrid picture, I know, but winter lighting is not perfect in my kitchen.
We started with candy plates. To make these we bent foil cake pans into heart shapes, lined them with star mints, and heated them in the oven at 350 for 8 minutes.
Our two-bedroom apartment, packed to the gills with 4 people and 2 cats has no private spaces. So we pulled 2 pair of sparkly curtains out of the tote full of curtains and tablecloths, pinned them together, and draped them over the table. A couple of low boxes covered with a table cloth and two large pillows became furniture.
We grabbed tealight candles left from Christmas and a pad of Craftsmith foiled paper. My son quickly punched a fluted circle for each candle and placed them in my bread pans. We lined those up against the far side of the sparkly cave. The edges of the bread pans protected the candles from the curtains.
AJ's sweetie is a wrestler and must watch what he eats before a match. With that in mind we had to come up with a limited menu. She decorated rice cakes with writing icing and served Martinelli's in wine glasses.
It's not easy finding things for these two to do that will fit within my list of rules for 9th grade sweethearts. But celebrating the little things is important at any age. Yep, I was glad to help, and enjoyed it thoroughly!!! 
Here's to young love and sparkly caves under the table.

Scrap On!

~charity~

Saturday, January 16, 2016

The Key to Love

My favorite card season is upon us!
I just love dressing paper up with lace, and trinkets, and lots of sparkle.
~ Love ~
 
For the twine wrap around the frame I left a loop on the outside of the frame, passed the twine under the frame to the inside, over the frame, and through the loop. Then I gently tightened it and made another loop.
 

Supplies:
Paper:Craftsmith Co, Crate Paper,
 Bo Bunny, Recollections
 Vellum:Crate Paper
Twine:The Twinery
Chipboard:Prima
Ink:Close To My Heart
Embossing Folder:Darice
Metal Shapes:Momenta
Alpha:Making Memories
Punch #905 & #310:Kreaxions

Scrap On!

~charity~

Saturday, January 9, 2016

Paper Cones

Need more photo clips for all those Christmas pics of family?
Throw together some nifty paper cones in off season colors and you are all set!

I like the tone on tone grey swirl from Craft Smith, Crystal Frost.
To make the cone with the lime splash I used Kreaxions punch #310.
1) Punch a 6" long strip of paper, trim to .5" above the design to get the correct width.
2) Layer and adhere punched strips over 9" x 5.5" rectangle of contrasting paper.

3) Set circle cutter to 9". Trace a half circle on the back of the rectangle strip.
4) Cut out circle and fold paper into cone. Fasten with brads.
5) Cut a .5" to 1" slit in the point of the cone for holding photos or cards.
 Use your new paper cones year round for displaying your favorite photos!

Supplies:
Paper:Craftsmith, Recollections 
Punch and Circle Cutter:Kreaxions
Brads:Spare Parts

Scrap On!

~charity~

Saturday, January 2, 2016

Snowflake Card

Winter windows just aren't complete without a few paper snowflakes. I never was very good at getting my folds exact so that all six sides of my design matched. This winter I discovered how to make snowflakes with my Kreaxions punches.
 Problem Solved!!!


Tutorial:
To begin this project you will need a circle cutter, protractor, punch #301, and scissors.
Step1:
Cut a 5 inch circle from Cardstock.
Divide the circle into 12 sections. 
This is easiest to measure at 30 degree intervals with a protractor.
Step 2:
Punch every other line with Punch #301, 
centering the punch exactly each time.
Step 3:
Cut the circle again with the Circle Cutter set at 4 inches.
Step 4:
Punch the in between lines with Punch #301.
Step 5:
Trim the outside set of punch marks.
I curved mine toward the center, as drawn on the paper.
It may take a few tries to get the hang of punching exactly on the lines. 
If your first few tries come out a little damaged cut them in half and use them as layers, peaking out from behind a photo or card sentiment.
Supplies:
Paper:Recollections
Punch:Kreaxions #301
Circle Cutter:Kreaxions

Scrap On!

~charity~