Showing posts with label Robins Nest papers. Show all posts

Wednesday, June 14, 2017

How To Make Flowers for A Spectacular Sunshine Layout

Here is an easy tutorial if you need to know how to make flowers for a spectacular sunshine layout. I like to give my projects the personal touch of matching embellishments. For this one pager I was able to coordinate my flowers with my title as well as my background cardstock, all from The Robin's Nest.
~ Hello Sunshine ~
To begin this layout I chose the Moss Green Glitter cardstock and sewed a strip of the Snow Covered Trees cardstock along the side.

My photo mat started with several strips of washi tape. I topped this with layers of Wedding Cutouts cardstock and Smoky Chevron cardstock.
 I stitched these layers down then added two ephemera cards from the Saffron Cards collection. The card tucked under the photo I cut in half to offer multiple focal points.
 Now that my basic layout was ready I made the flowers. The Wedding Sticker sheet was just the right colors for my theme. I punched two sets of the same flower in a similar print and one set of smaller flower in a contrasting color. I stacked the larger flowers with the petals opposite of each other. The small flower went on top with a Blue or Yellow Dew Drop for the center.

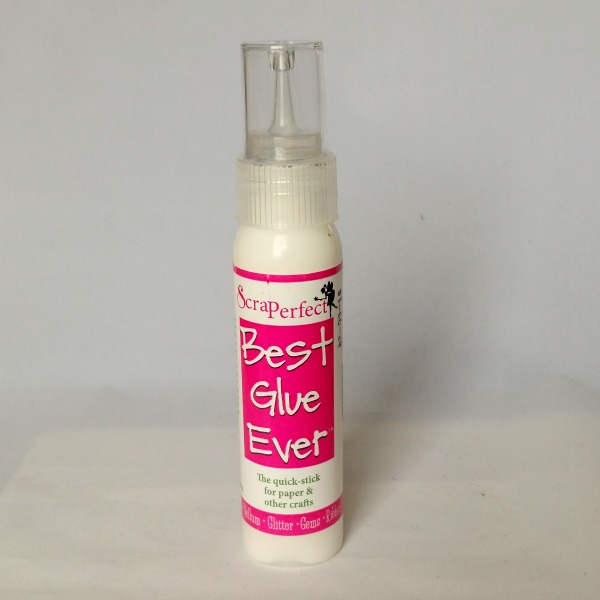
    To hold these layers of flowers together I used the Best Glue Ever. This super strong yet fantastically flexible glue from ScraPerfect is wonderful for hand made flowers.
I punched flowers from Bunny cardstock to coordinate with the Saffron Cards. The smaller flowers are from the Daisy Stripe Teal cardstock. I used Blue Dew Drops for the centers of the yellow flowers also. 
 Embellie Gellie made it super easy to place dew drops at the flower centers and with the cork chevrons.

For a little variety I added a pre-made flower as the center of each flower cluster. The final touches of wood leaves and chipboard vines are held of with just a drop or two of BGE.
The Saffron Ephemera Cards were perfect for accents as well as a title. They had just the right hues and delicately flourished letters.
The blues and yellows of the flowers add to the elegant look of this one page layout. Their mild tones create the perfect foil for this poignant black and white photo.
 
Supplies:
Paper, Dew Drops, Ephemera Cards:The Robin's Nest
Pre-made Flowers:Prima
Cork:American Crafts
Vines:Gina's Designs
Wood Leaves:Peachy Cheap
Washi Tape:Love My Tapes, MME,
Glue, Embellie Gellie:ScraPerfect

Scrap On!

~charity~

Wednesday, May 31, 2017

How To Make A Delightful Bracelet That is Quick and Easy

If you like altered items then you will want to know how to make this delightful bracelet that is quick and easy.  I love costume jewelry. when this fun piece showed up in a box from my Grandmother I knew right away it was destined to become something NEW!
~ Forget Me Not ~
 The bezels had a resin or epoxy substance with glitter in them. A bit of concentrated heat from the heat gun had them popped right out. They had yellowed and looked grimy. 
 Step 1: Dab the top of the bezel with pigment ink.
Step 2: Place paper over a lightly padded surface, press bezel onto paper.
Step 3:Cut out inside of inked frame to use for a pattern. Press into bezel to trim any high edges.
Step 4:Trace pattern onto reverse of Wedding Cut-Outs Cardstock.

Step 5: Use a dab of the Best Glue Ever to tack the paper down to the bezel. This ScraPerfect glue is so versatile it is perfect for attaching the cardstock to the metal.
Step 6:Pour gloss medium onto bezel, add Heart Dew Drops and two Black Diamond Dew Drops. To attach these items use Embellie Gellie. It helps put small items EXACTLY where you want them!
Step 7: Leave to cure for 24 to 48 hours.
To string the bracelet use elastic cord. Measure the width of the wrist plus one inch for tying fasteners. Bead, tie, and add fasteners to the ends. 
 Wear your new bracelet or give as a gift.
This dramatic bracelet is sure to please where ever it goes!
Supplies:
Paper and Dew Drops:Robin's Nest
Pigment Ink:Clearsnap
Glue, Embellie Gellie:ScraPerfect
Beads:Bead Treasures
Clear Stretch Cord:Cousin
Glossy Medium:Ranger

Scrap On!

~charity~

Wednesday, May 17, 2017

How To Make A Spectacular Butterfly Magnet Gift

Here is a quick tutorial on how to make a spectacular butterfly magnet gift. Quick is good when making teacher gifts. With the multitude of events to attend at the end of the school year it is difficult to find time to craft a little appreciation gift. These butterflies are simple yet as dramatic as the papers you choose.
~ Butterfly Magnets ~
The first step in making these butterflies is to choose coordinating papers. My only concern was matching my papers, all from The Robin's Nest, with the Little Friends I used for the bodies. I put a dark layer at the center, stripes in the back, and florals up front. 
The top layer of butterflies are cut from Pink Roses Cardstock and Daisy Stripe Cardstock. The center layers are cut from Daughters Cardstock and Charity Cardstock. The last layer is the reverse of Spring Flower Cardstock and Star Glitter Cardstock .
With my Just Imagine Crafts Butterfly Die I cut two layers of paper at a time. I used Kreaxios 4-in-1 Punch #305 on the tips of the floral butterfly. I trimmed the tips of the center butterfly to match the top one.
I used Deco Art acrylic paint in Shimmering Silver to gild the edges of the blue butterfly and in Splendid Gold for the other.
 I cut the antennae from the center butterflies. I stacked the sets together and folded the wings up on either side.
 To hold the variety of materials together I only needed one adhesive, Best Glue Ever.
A thin strip of glue on the striped and center butterflies is sufficient to hold the paper together. A thicker strip of glue attaches the soft body of the Little Friend to the top butterfly.
A circular smear of the same glue attaches the butterfly to a magnet. Without my ScraPerfect products I would have had to use three types of glue. With BGE I am guaranteed a strong, flexible hold that dries quickly.
After the glue had dried I adjusted the wings of the butterfly so each layer is visible. Curl the tips of the wings around a pencil to mimic movement.
 Slip two or three of these butterflies in a gift bag and let your child enjoy making their teacher smile!
Supplies:
Paper, People:Robin's Nest
Butterfly Die:Just Imagine Crafts
Corner Punch:Kreaxions #305
Paint:Deco Art
Glue:ScraPerfect
Magnets:Stash

Scrap On!

~charity~


Monday, March 6, 2017

How To Make an Easy Yet Beautiful 3D Paper Rose

Today's post is all about how to make an easy yet beautiful 3D paper Rose in just three steps. This dazzling flower starts with a sheet of Robin's Nest Cardstock. With a snip and swirl a garden of black and silver roses bloom across your card.
~ Touch The Stars ~
The Silver Roses Glitter Cardstock has roses scattered randomly across it. Find it and the other beautiful papers and embellishments used for this card at The Robin's Nest store.
Directions:
Step 1) Carefully cut a rose along the silver outer edge.
Step 2) Cut that rose into a spiral, using the silver line as a vague pattern.
Step 3) Starting at the center, curl and glue the paper into a rounded shape. Press the glued surfaces together until the adhesive bonds before moving onto the next portion.
ScraPerfect provides the exact tools needed for this project. The Best Glue Ever is the just-right bonding strength and the large No-Clog Writing Cap allows you to place a single dot of glue at strategic points.
Embellishments:
Metallic Trim:Pink Straw
Pink Tag Sticker:Daughter Stickers
Moon card:Rosy Cards
Doily:Punched from Rosy Diamond Cardstock with Kreaxions Punch #913
Butterfly:Punched from Rosy Chevron Cardstock with Kreaxions Punch #604
In the US Kreaxions product are available from Just Imagine Crafts.
This card is a 5x7" base of Smoky Chevron Cardstock with a 4.5 x 6.5" layer of Wedding Cut-Outs Cardstock over the top. For a finishing touch I used the Best Glue Ever to add Metallic Pink Dew Drops to the roses, butterfly, and doily.
Check my blog Scrappin' Chaos for a list of supplies.

Scrap On!
~charity~

Wednesday, February 15, 2017

How to Make a Bling Free Gentleman's Gift Tag

Here's how to make a bling free gentleman's gift tag for those of you with men adverse to glitter. You know the type I'm referring to. At the sight of too much shine their eyes widen, their breathing accelerates, and you can see their hand twitching, desperate to vacuum up the mess before it happens!
~ Gentleman's Gift Tags ~
Even with a ban on glitter, a gift tag doesn't have to be plain. For this trio of tags I used primary colors, punches, and layers of paper. This kept the tags simple without being too basic.
 For the Thanks I cut the Red Plain Linen Cardstock to 5"x 3.25"
The reverse side of the Green Elephant Glitter Cardstock is cut to 4.75"x 3".
The Scroll sticker is from the Regency Sticker Sheet.
I used a die to cut the word "thanks" from the center.
The Lion Tag begins with the same size plaid paper as a base with corners rounded.
The green is the reverse side of the Dinosaur Cardstock cut to 4.75"x 3".
The corners are punched with Kreaxions Punch #305
The oval Lion sticker is from the Regency Sticker Sheet.
 
  For the Royal Tag the plaid paper is the same size base.
The red is the reverse side of  Lips Glittered Cardstock cut to 4.75"x 3".
I cut around the Tag on the Regency Sticker Sheet 
and used the Kreaxions crown punch on the lower corner.
To assemble the tags I used ScraPerfect's Best Glue Ever
This glue is super strong so a little bit goes a long way!
After assembling the tag I trimmed the top corners so the layers lined up.
I cut down on the frills by using ric-rac to hang the tag. 
The boys need never know it is from my collection of vintage trims.
That will be our little secret!

Supplies:
Paper, Stickers:Robin's Nest
Glue:ScraPerfect
Punch #305 & #611:Kreaxions
RicRac:Vintage Trim

Scrap On!

~charity~


Tuesday, January 31, 2017

A Vibrant Card Filled to the Brim with Love

A mason jar stamp and cork hearts make a vibrant card filled to the brim with love. Today is the Design Team Extravaganza at Just Imagine Crafts. Stop by to see what our wonderful artists have created for your viewing pleasure.
~ So Much Love ~
Mason Jar Card With Hearts and Gems
For this card I punched the top sheet of paper on both sides using Punch #311 from Just Imagine Crafts. After inking the edges I threaded ribbon through the punched design and added Robin's Nest Dew Drops in red and neon pink. Of course my dew drops and gem hearts wouldn't stay attached without ScraPerfect's Best Glue Ever.

The Mason Jar is stamped onto green paper then
 cut out and popped up with adhesive foam.
 The cork, gems, and glitter are glued inside.

Supplies:
Paper:Robin's Nest, Bella Blvd
Tiny Type:Authentique
Dew Drops and Gem Hearts:Robin's Nest
Stamp:Little Yellow Bicycle
Cork Hearts:American Crafts
Glitter:Dollar Tree
Trim:Webster's Pages
Border Punch:Kreaxions #311

Scrap On!

~charity~

Wednesday, January 18, 2017

How to Use a Sled to Celebrate Fantastic Winter

After Christmas the walls are bare and it's time to learn how to use a sled to celebrate fantastic winter. Sledding is one of my favorite childhood recollections. Grandma's driveway and a good runner sled were the perfect recipe for learning to fly!
~ Winter ~

Step 1. Disassemble the wood sled and trace the runners and slats
onto the back of the Winter Snowflakes Cardstock
 Winter Sled with Robin's Nest Papers
 Step 2. Paint the sled pieces with flat acrylic paint, leave to dry.
  Winter Sled with Robin's Nest Papers
Step 3. Cut the paper pieces and glue onto the top and sides of the sled. I used ScraPerfects Best Glue Ever to be certain the paper would bond with the wood and not leave wrinkles.
Winter Sled with Robin's Nest Papers
 Step 4. Reassemble the sled using the same glue, clamp and leave to dry.
Step 5. Assemble a variety of embellishments using ScraPerfects Best Glue Ever to adhere layers to each other. This is particularly important when using glitter stock.
Winter Sled with Robin's Nest Papers
 The Winter label is cut from the Winter Words Glitter Cardstock and backed with Blue Robin Glitter Cardstock.
The punched snowflakes are centered with Silver Dew Drops.
The larger circles and snowflakes are punched from Blue Glitter Chipboard.
The fluted glitter circles are topped with a smaller circle punched from the Snowflake Cardstock,
and the blue glitter snowflakes are topped with Winter Snowflakes Glitter Chipboard and a brad.
A Moss Green Doillie Die Cut and Blue Glitter Journal card finish out the embellishments. Winter Sled with Robin's Nest Papers
Step 6. Decorate sled with layers of embellishments.

Step 7. Hang your artwork with a bit of ribbon and enjoy winters gift of glitter!

Supplies:
Sled:Darice
Glue:ScraPerfect
Brad:Spare Parts
Snowflake Punch:Fiskars
Decorative Corner Punch:Kreaxions
(Instructions for Blue Glitter Snowflakes here)

Scrap On!

~charity~