Showing posts with label altered jar. Show all posts

Wednesday, August 16, 2017

How To Make A Bright, Colorful, Worry Free Aquarium

This post on how to make a bright, colorful, worry free aquarium is for anyone who likes the beauty without the bother.  My kiddos are always wanting another pet, but not the chores that go along with it. Using stamps, pigment ink, and an empty jar I created an aquarium that will never need more than dusting!
~ Foiled Fish Aquarium ~
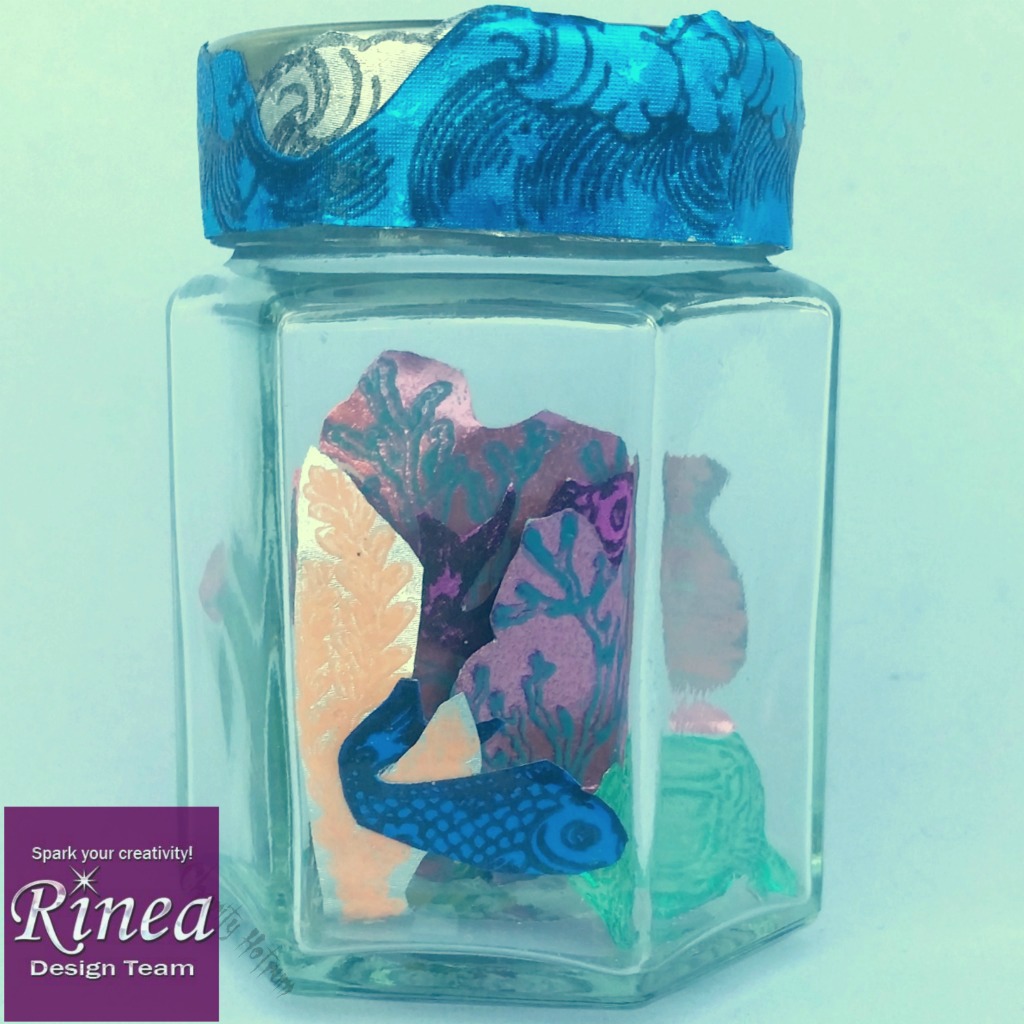
I knew I wanted a lot of different colors in my aquarium so I used the Jewels Variety Pack of Rinea Foiled Paper. This set has both glossy and star embossed papers. 
Pigment ink stamps easily onto Rinea Foiled Paper but is just as easy to smear. The good thing with that is a smear can be cleaned off and the same paper re-stamped. Heat embossing the Foiled Paper is tricky but with a light hand and a little practice it is no big deal. One tip is to emboss one image, or portion of an image at a time, allowing the paper to cool between.
I placed the largest piece of "coral" at the center of the jar then built out from that on either side. I used different colored paper for the fish and coral but the same stamp. This view of the side gives an idea of the many layers. 
To adhere the foiled paper to the bottom of the jar I bent the lower edge under and applied a thin line of the Best Glue Ever. After letting the glue dry to a semi-clear state I placed the foiled paper image in the jar and used a bamboo skewer to tamp down the glued portion.

The lid of the jar is more Rinea Foiled Paper that has been heat embossed with an ocean wave theme. The Foiled Paper waves were glued to the jar lid using the same Scraperfect glue.
Once again I found I could NOT take gorgeous photos of my project without the help of the Perfect Cleaning Cloth. Every adjustment left finger prints on the foil decorated lid or glass sides. After a really good clean I used the Perfect Cleaning Cloth to reposition the jar for each photo.

Supplies:
Foiled Paper:
Pigment Ink:Clear Snap
Embossing Powder:WOW
Stamps:All Night Media, Sheena Douglas
Jar:Smuckers
Glue:ScraPerfect

Scrap On!


~charity~


Thursday, October 6, 2016

Boo Jar

How about a super SCARY night light.
No worries, it sports a battery operated candle so it's super safe!
~ Boo Jar ~
For this project I used a pickle jar. If you are worried about glass in a little ones room simply use a peanut butter container.
 Step 1:Use a foam brush to dab black acrylic paint onto the sides and back of jar, leaving a window to frame the ghostie.
The paint can be dabbed on lightly so the glow of the candle shows through.

Step 2:
Cut gate from Haunted House Cardstock.
Cut "Boo" from Boo Words Glitter Cardstock.
Cut pumpkins from Pumpkins Glitter Cardstock.
Cut web from Spiderweb Glitter Cardstock.

Step 3:
Pierce lid of jar using nail or paper piercer.
Tie knot in yarn, thread through hole in lid so knot stays on top.
 Attach yarn to Friendly Ghost and suspend in jar.
 Step 4:Glue web to top of jar lid. Use a magnet for a clamp.
Step 5: When the jar is dry adhere gate to inside of jar, facing window. Adhere Boo to top of window and pumpkins to base of window.
Step 6: Place battery operated candle in jar.
This cute project takes an up-cycled container and a sprinkle of imagination. Make one for a child's room or several to line the porch rail.

Supplies:
Cardstock, Ghost:Robin's Nest
Acrylic Paint:Deco Art
Battery Candle: Dollar One
Pickle Jar:Nalley

Scrap On!

~charity~