Thursday, August 31, 2017

How To Make a Beautiful Model With Colorful Paint

Today I have a few tips and photos for how to use colorful paint to make a beautiful model. I had Spine Surgery in mid-July. To keep me occupied with out overdoing it my daughter suggested we assemble and paint this wooden St. Petersburgh Cathedral.  
We have nearly the full collection of Deco Art Dazzling Mettalics paints and have been eager to use them on a project.
These wood models are difficult to assemble. They contain many pieces and they don't quite fit together right. We have done many so we were ready with a craft knife for trimming and hot glue for assembling. We use the hot glue more as a sealer that fills in for the pieces that aren't there.
We assembled in layers, fine tuning each piece to fit and lay properly before we painted. Two layers of acrylic paint give sufficient coverage. We always add a coat of paint to the back to avoid glaring edges. 
For this model we purchased a string of LED lights. To create a glow I added vellum to the windows. ScraPerfect's Best Glue Ever attached the vellum without leaving marks. Spreading a thin layer of the glue and letting it dry to a semi-gloss ensured perfect attachment.
 One nights work was done in such a rush that it had to be resurfaced the next day. For this I used ScraPerfect's solvent, Best Cleaner Ever. I spritzed it on the pieces, let them sit for a few minutes, then rubbed off the layers of black and silver paint. 
For our project we used 9 colors of paint in a variety of combinations. We completed the ground floor and central tower first. We used variations of that design to decorate the other towers. The spires are divided into 5 Purple/Gold, 2 Blue/Silver, 2 Green/Silver, and 2 Plum and Olive with Silver. The roof of the first floor is primarily Teal, and Black cleanses the pallet between layers of color.
For our project we used 9 colors of paint in a variety of combinations. We completed the ground floor and central tower first. We used variations of that design to decorate the other towers. The spires are divided into 5 Purple/Gold, 2 Blue/Silver, 2 Green/Silver, and 2 Plum and Olive with Silver. The roof of the first floor is primarily Teal, and Black cleanses the pallet between layers of color. 
Don't worry if your model leans a little or is missing pieces. The finished project is about the time spent together and the joy of accomplishment. Perfection isn't a necessary ingredient for happiness.

Supplies:
3-D Wood Model:Sea Land (Amazon)
Acrylic Paint:Deco Art
Vellum, Hot Glue:Hobby Lobby
Glue, Solvent:ScraPerfect

Scrap On!

~charity~


Wednesday, August 16, 2017

How To Make A Bright, Colorful, Worry Free Aquarium

This post on how to make a bright, colorful, worry free aquarium is for anyone who likes the beauty without the bother.  My kiddos are always wanting another pet, but not the chores that go along with it. Using stamps, pigment ink, and an empty jar I created an aquarium that will never need more than dusting!
~ Foiled Fish Aquarium ~
I knew I wanted a lot of different colors in my aquarium so I used the Jewels Variety Pack of Rinea Foiled Paper. This set has both glossy and star embossed papers. 
Pigment ink stamps easily onto Rinea Foiled Paper but is just as easy to smear. The good thing with that is a smear can be cleaned off and the same paper re-stamped. Heat embossing the Foiled Paper is tricky but with a light hand and a little practice it is no big deal. One tip is to emboss one image, or portion of an image at a time, allowing the paper to cool between.
I placed the largest piece of "coral" at the center of the jar then built out from that on either side. I used different colored paper for the fish and coral but the same stamp. This view of the side gives an idea of the many layers. 
To adhere the foiled paper to the bottom of the jar I bent the lower edge under and applied a thin line of the Best Glue Ever. After letting the glue dry to a semi-clear state I placed the foiled paper image in the jar and used a bamboo skewer to tamp down the glued portion.

The lid of the jar is more Rinea Foiled Paper that has been heat embossed with an ocean wave theme. The Foiled Paper waves were glued to the jar lid using the same Scraperfect glue.
Once again I found I could NOT take gorgeous photos of my project without the help of the Perfect Cleaning Cloth. Every adjustment left finger prints on the foil decorated lid or glass sides. After a really good clean I used the Perfect Cleaning Cloth to reposition the jar for each photo.

Supplies:
Foiled Paper:
Pigment Ink:Clear Snap
Embossing Powder:WOW
Stamps:All Night Media, Sheena Douglas
Jar:Smuckers
Glue:ScraPerfect

Scrap On!


~charity~


Wednesday, August 9, 2017

How To Make An Elegant Peacock From Colorful Flowers

Here is how to make an elegant peacock from colorful flower petals. During the month of August Rinea is collaborating with Petaloo by Floracraft. When I opened my parcel to the Cool Tones Floradoodles all I could see was the green, blue, and purple of peacock feathers.
~ Flower Petal Peacock ~
 
 Copper is my favorite metallic tone and the perfect compliment to my stash of flowers. How delightful that Glossy Copper Foiled Paper is available by the role from Rinea! Follow the steps below to make your own Flower Petal Peacock.
Supplies:
Glossy Copper Foiled Paper, cut to fit 7x11 Frame.
Foiled Paper in Contrasting color for Head and Neck
Decorative Corner Punch for edge of Peacock Body
ScraPerfect glue for attaching petals to Foiled Paper.
Assortment of Floradoodles in cool tones, cut into individual petals.
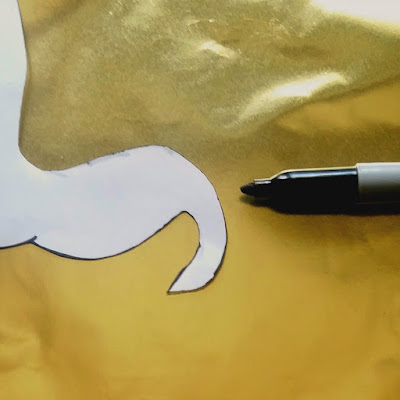
Draw or Print peacock silhouette. Trace onto foiled paper.
Place one drop of the Best Glue Ever onto each petal. Allow to dry to semi-clear finish.
 Add petals to the peacock silhouette starting at the tip of the tail and working upward.
 Trace the head and body of the Peacock Silhouette onto a contrasting color of Rinea foiled paper from the Jewels Variety Pack.
 Carefully cut out the shape. The curve of paper from the peacocks neck makes an excellent wing shape. Use corner punch for the lower edge of the body.
 Glue the body over the tail feathers, adjusting and filling in petals as necessary. Place short petals on head for top knot. Place Flower Petal Peacock in frame. Add layers of cardboard till foiled paper fits snugly without a wrinkle. Use Perfect Cleaning Cloth to remove finger prints from foiled paper.
Supplies:
Foiled Paper:Rinea
Flowers:Petaloo
Frame:Green Briar Int.
Corner Punch:Kreaxions
Adhesive and Cleaning Cloth:ScraPerfect
Scrap On!

~charity~